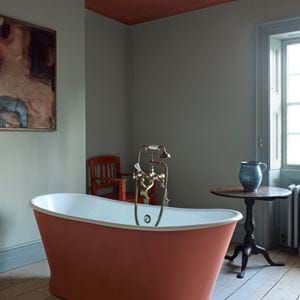
How to light a bathroom
How to light a bathroom
Lighting a bathroom can seem daunting when there’s so much to consider – not least the safety aspect – but that needn’t be the case. With a little knowledge under your belt, and a simple approach (no lighting designer needed!), you can very easily create a space that’s perfectly illuminated.
Practicalities versus atmosphere
Bathrooms are, all too often, far too brightly lit. The default is usually to scatter the ceiling with spotlights and call it a day. But while bathrooms do sometimes need to serve a practical purpose – for putting on makeup or brushing teeth, for instance – the last thing anyone wants first thing on a dark winter’s morning, in the middle of the night, or while taking a bath is to be blinded by overhead lighting.
By all means, put in spotlights, but also consider that practical tasks are generally undertaken at the sink, so a pair of wall lights here might be a better – and more flattering – solution. They’ll give you plenty of light where you need it most without creating a glare, and softly light the rest of the room too.
You may also want to include a light for when you’re reading in the bath. Your by-the-sink wall lights might be enough, but if not, we like to use a cordless lamp such as Hanover on a small stool (Northwich is perfect) or table that you can also pop your book or cup of tea on. It’s the simplest solution, and including freestanding pieces like this in a bathroom can help it feel more homely and less clinical.
Otherwise, you may want to add additional wall lights around the room if it’s a bigger space. Recessed LED strips (make sure they’re a warm white colour) can also work well underneath the bath and cabinets, especially in a more modern space. And speaking of cabinets, internal lighting here is incredibly useful. Our Jarrow and Chichester wall cabinets have it already built in.
Switches
Switches play a big part in how effective your bathroom lighting is because, set up right, they’ll allow you to control which lights are on when and set the mood accordingly. Without getting too technical (although it’s good to be informed so you can brief your electrician accurately), each toggle on the switch controls what’s known as a ‘gang’. You can then divide your bathroom’s lights up into these gangs – we’d suggest placing wall lights on one, ceiling lights on another (preferably on a dimmer), and any other feature lighting such as recessed LEDs on a third. That way, you can choose, for instance, to only turn on the softest lighting when you’re getting up in the middle of the night, and only wall lights for first thing in the morning.
It also pays to have a separate gang (or even a separate switch altogether, to avoid any confusion) for your extractor fan, so you don’t need to turn it on when you’re just popping to the loo.
Everything you should know about IP ratings
IP stands for ‘ingress protection’ and is a rating applied to lighting so you know whether or not it’s safe to use around water (and dirt, although that’s more relevant to the garden than the bathroom). There are different levels of IP ratings depending on the level of protection, which are indicated by two numbers following the ‘IP’ bit. The higher the number, the better the protection. The first number refers to dirt, so don’t worry about this for your bathroom (we’ve replace it with an ‘X’ below). The second number refers to water and is the part you need to pay attention to.
Having the correct IP-rated light is crucial for certain areas of your bathroom, but a common misconception is that it affects the whole room. There are four zones to know (each is also marked out in the illustration).
- Zone zero is inside the bath and shower tray, and lights here must have a rating of IPX7.
- Zone one stretches to 225cm from the floor above the bath and within the shower cubicle, and these lights must be a minimum of IPX5.
- Zone two is within 60cm around the perimeter of the bath or shower (again to a height of 225cm), and then a further 75cm immediately above zone one (so will affect spotlights unless you have very tall ceilings). It also includes the area around your sink, but specifically within a 60cm radius of the tap. Lights in zone two need to be IPX4 or higher.
- Zone three is anywhere else, and you don’t need to use an IP-rated light in these areas.
In our collection, Brunswick is the only light with an IP rating – IP44, which means you can use it within zone two. Any of our other wall lights could go above your sink (or in any other zone three area), as long as they’re more then 60cm from the tap and don’t fall into another zone two or one area.
Why you should make a lighting plan
While we’re definitely advocates for making a lighting plan for every room in your home, the bathroom is the one space where we’d say it’s an essential. If you’re renovating, this is something you should do right at the very start, around about the time that you decide on the room’s layout. You also definitely don’t need a designer or architect to do this for you.
It’s easiest to design your lighting plan on paper. We’d suggest taking your bathroom’s floorplan and laying a piece of tracing paper on top (that way, you can easily throw it out and start again if you decide to make a change without drawing or printing out another floorplan). Mark out the edges of the room on the tracing paper, then simply add in where you’d like each form of light – wall lights, pendants, spotlights, recessed LEDs, etc. Use a different symbol for each type (stars for wall lights, circles for spots…) and make sure you include a key. You should also mark the position of any electrical outlets on this plan too. Finally, add the position of the light switches if they’re moving (this is also where you can indicate how many gangs you want on each switch).
Be as specific as you can on your lighting plan. For instance, indicate how high wall lights should be positioned (about eye height tends to be the most comfortable), and how far apart (it’s a good idea to know at least roughly how big your mirror will be at this point). That way, if you’re not on site when they’re installed, you won’t come home to any costly surprises.
All that done, pass your plan onto your electrician.
Take a closer look at all the designs in our lighting collection.


